How to Build DIY Window Flower Boxes in 5 Simple Steps

Creating charming and functional DIY window flower boxes is one of the best ways to elevate your home’s curb appeal. Whether you’re working with a rustic farmhouse, a cozy cottage, or even a modern-style home, adding window flower boxes can bring an extra layer of beauty and personality to your space. But how do you build your own DIY window flower boxes from scratch? Don’t worry! I’ve got you covered.
Why Should You Build DIY Window Flower Boxes?
Before jumping into the details of building these flower boxes, you might be asking, “Why should I create my own instead of buying pre-made ones?” Well, let me tell you that building your own DIY window flower boxes offers several advantages:
- Customization: You can choose the size, style, and materials to suit your unique space.
- Cost-Effective: DIY flower boxes are often much cheaper than buying pre-built ones, especially if you have basic woodworking skills.
- Satisfaction: There’s something incredibly satisfying about completing a project yourself, and flower boxes can add an immediate pop of color and personality to your home.
- Durability: When built with the right materials, DIY window boxes can last for many years, withstanding the elements and providing an attractive focal point for your windows.
Step 1: Gather Your Materials and Tools

Materials:
- Wood or PVC Boards: Choose sturdy materials that can handle the weight of plants and outdoor conditions. For a classic look, wood is ideal, but for low-maintenance durability, PVC boards are a great option.
- Nails or Screws: These will be used to hold the box together securely.
- Wood Glue or PVC Glue: This is essential for bonding the boards together.
- Decorative Trim: To add character, you’ll want to trim the edges of the flower box with a stylish molding or decorative piece.
- Drainage Holes: You’ll need to drill holes for water drainage, preventing the flowers from drowning in rainwater.
Tools:
- Measuring Tape: Accurate measurements are crucial for getting the dimensions just right.
- Saw: Whether it’s a miter saw, jigsaw, or circular saw, a saw will help you cut the wood or PVC boards to the correct size.
- Drill: You’ll need a drill to make drainage holes and secure the screws.
- Caulk Gun: Use a caulk gun to seal edges and ensure your box is weatherproof.
- Paint or Finish: If you’re using wood, a protective coating is essential for longevity.
Step 2: Measure and Cut the Boards to Size
Step-by-Step Measurements:
- Width: Measure the width of the window from one side to the other. Add about an inch on each side to ensure a comfortable fit.
- Depth: The depth of the box should be deep enough to accommodate the roots of your plants. A typical depth ranges from 6 to 8 inches.
- Height: The height of the box depends on how much of a statement you want to make. A height of 6 to 8 inches is standard.
- A bottom piece that matches the width of the window
- Two side pieces that are the height of the box
- A front piece that matches the width
- A back piece that should match the width as well, but may be slightly higher than the front to create a slant for drainage.
Step 3: Assemble the Flower Box
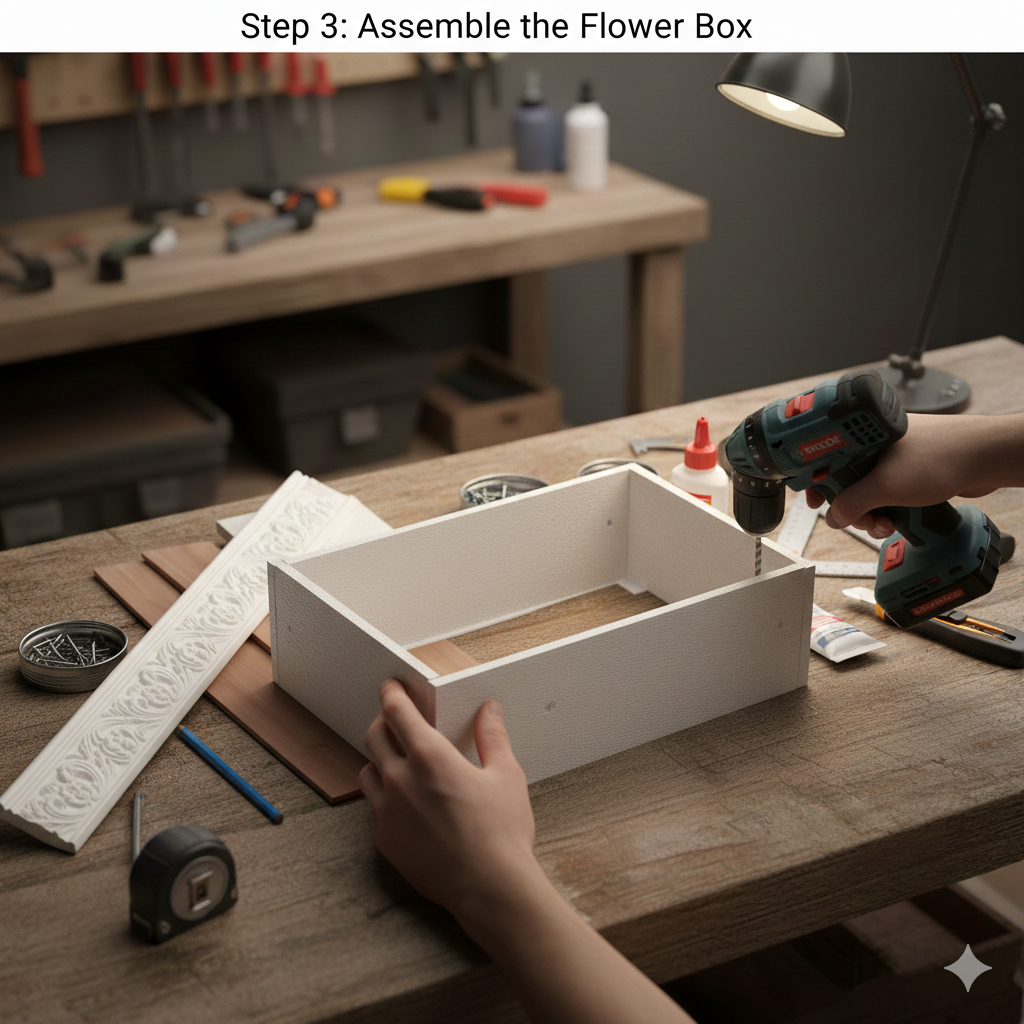
Instructions:
- Attach the side pieces to the bottom piece first. Use wood or PVC glue and reinforce with nails or screws. If you’re using nails, make sure they’re short enough to avoid protruding from the other side.
- Next, attach the front piece to the side pieces. The glue and screws will hold everything in place.
- Finally, secure the back piece to the assembly, ensuring the box is square and level. You can now use additional screws to reinforce the structure.
Step 4: Add Decorative Trim

Here’s how to do it:
- Cut your trim pieces to the correct lengths using a miter saw.
- Attach the trim pieces to the edges of your flower box using glue and nails.
- Be sure to caulk any seams where the trim meets the box to prevent water from seeping in and causing damage.
Step 5: Install the Flower Box and Finish
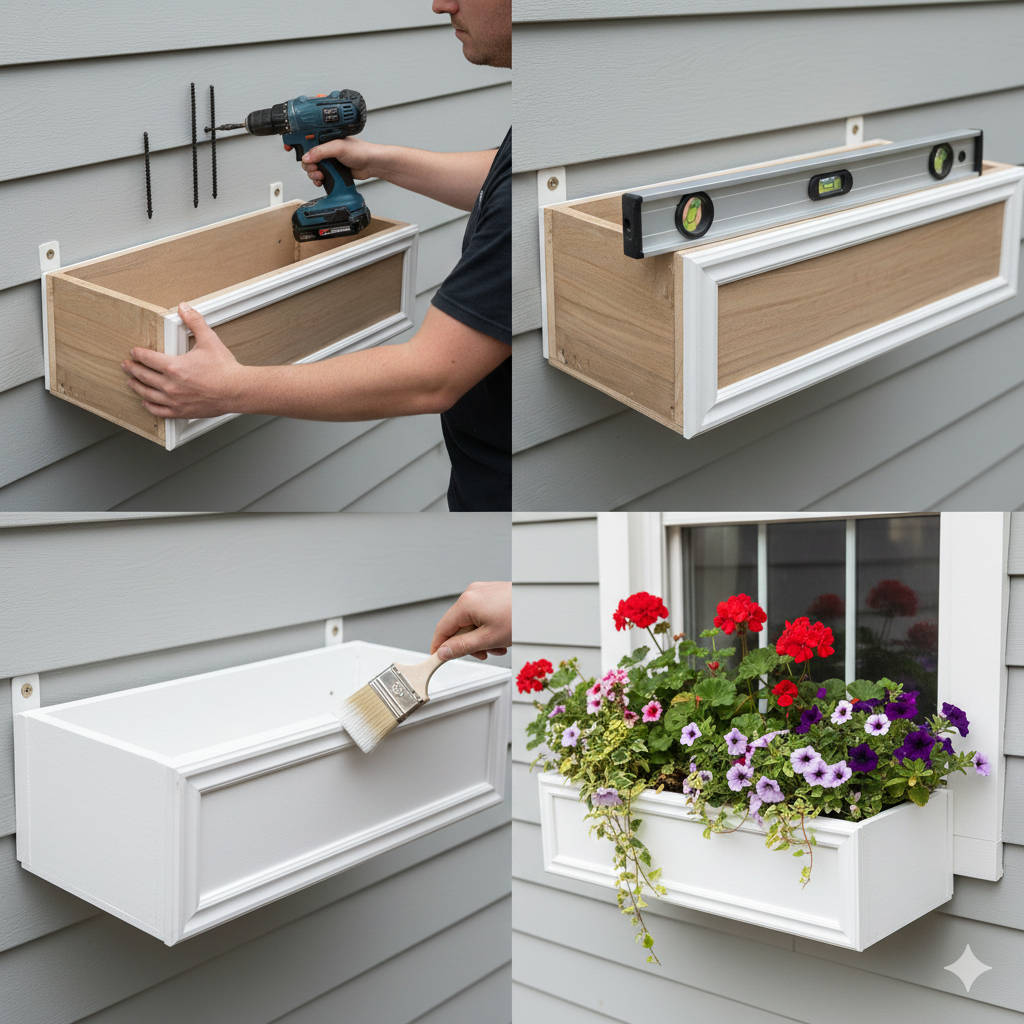
Installation Tips:
- Use Exterior Screws: Use screws that are designed for outdoor use to prevent rusting.
- Mounting: Depending on your window’s structure, you can either attach the box directly to the siding or use brackets for support.
- Level the Box: Ensure the flower box is level so that it drains properly. If your window is slightly uneven, use shims to keep it straight.
Optional: Add Self-Watering Mechanism
FAQs
PVC and treated wood are both excellent choices for window flower boxes. PVC is durable, low-maintenance, and weather-resistant, while wood offers a more rustic, natural look.
How do I ensure proper drainage in my flower boxes?
Make sure to drill several drainage holes in the bottom of your flower box to allow excess water to escape. This will prevent the roots of your plants from becoming waterlogged.
If you live in a region with cold winters, it’s best to either use artificial plants or wait until the weather warms up to plant real flowers.
Conclusion
Building your own DIY window flower boxes is a rewarding project that can bring a fresh burst of color to your home. By following the simple steps outlined above, you can craft beautiful, functional flower boxes that perfectly complement your windows. Whether you opt for a classic wooden design or a sleek, modern PVC box, these flower boxes will become a delightful feature of your home.
Read the Original Article on Crafting Your Home