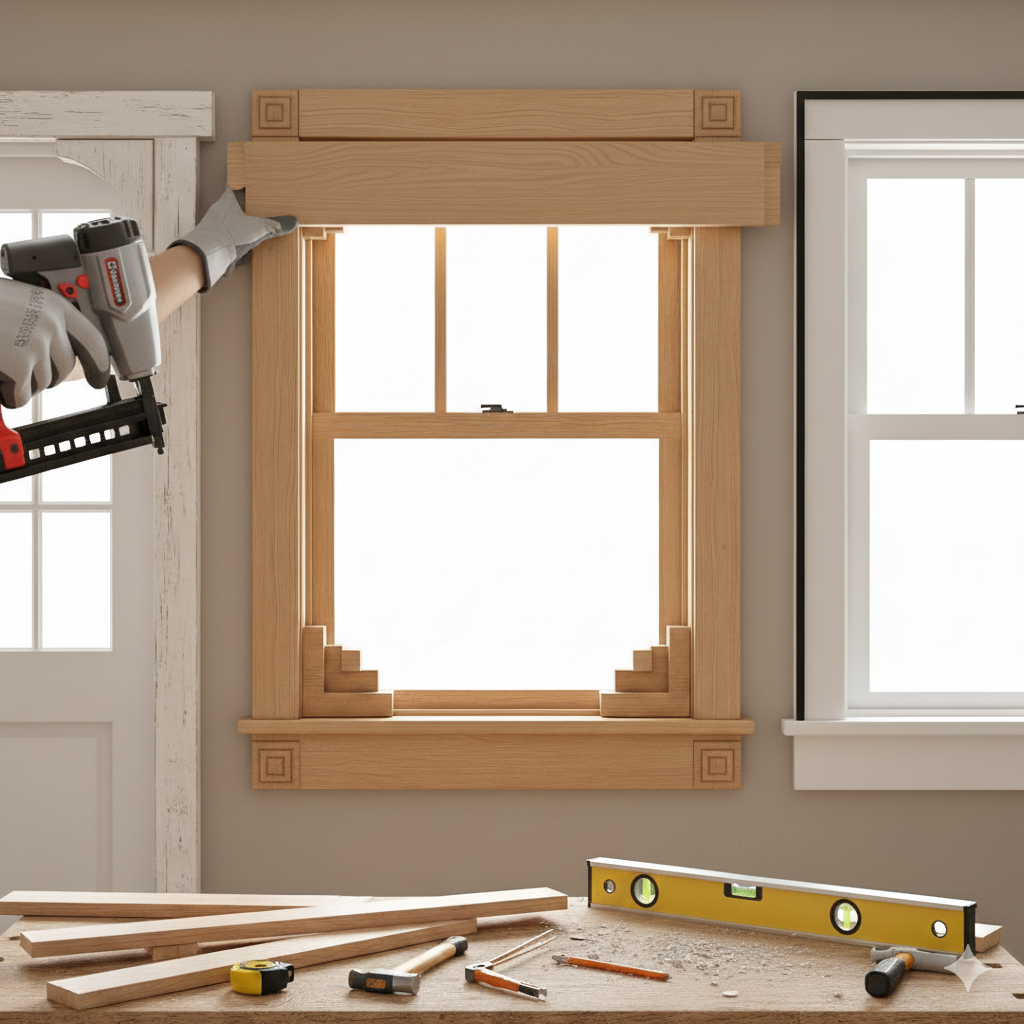
Easy DIY Window and Door Trim Ideas Without Miters
Image Credit: Gemini AI
When it comes to home renovations, there’s something incredibly satisfying about transforming a plain room into a space that feels refined and personalized. One of the simplest ways to elevate your home’s aesthetic is by updating your windows and doors with custom trim.
The best part? You don’t have to stress over complicated miter cuts. In this guide, I’ll take you through the easy process of installing DIY window and door casings that look custom, but don’t require any miter cuts. Whether you’re a seasoned DIYer or just starting out, these simple steps will help you achieve a professional-looking finish that adds timeless beauty to your home.
Why Skip the Miter Cuts?
Miter cuts are often dreaded by DIYers due to their complexity. The angle cuts needed to fit trim around windows and doors can be tricky and sometimes unforgiving. But here’s the good news: you can easily achieve stunning results without mitering a single corner. This style of trim, with straight cuts and clean lines, looks just as elegant, if not more so, than traditional mitered casings. Let’s explore how you can simplify your trimming process while still creating a high-end finish.
Understanding Window and Door Casing Basics
Before diving into the steps, it’s important to understand the elements that make up a window or door casing. The trim around a window or door includes the sill (or stool), jambs, casings, and the decorative header. Each part plays a crucial role in giving your windows or doors a finished and polished look.
Window Sill (Stool)
The window sill, also known as the stool, is the piece of trim that extends across the bottom of the window. It provides a ledge, where you can place decorative items like plants or books.
Jambs
Jambs are the vertical pieces of wood that frame the sides and top of the window or door. They are typically the first components to be installed.
Casings
Casings are the outer trim pieces that cover the joints between the window frame and the wall. They give your window or door a finished look and can be installed with simple straight cuts.
Header
A header sits on top of the window or door, adding a decorative touch. It’s a key piece in achieving a custom, high-end look.
Now that we have a basic understanding of the components, let’s break down the steps involved in creating your DIY window and door trim without the hassle of miter cuts.
Step 1: Prepare Your Window or Door Frame
Image Credit: Gemini AI
Before you start installing trim, make sure your window or door is prepped and ready. This step involves trimming away any excess insulation or drywall that could interfere with your trim installation. You want to ensure that the area is neat and the drywall is flush with the window frame.
If your window is new, you may need to use a utility knife to trim excess drywall or insulation. Make sure the framing is clean, as a neat edge will make your trim pieces fit more securely.
Step 2: Measure and Cut the Window Sill (Stool)
The first trim piece to install is the window sill. To determine the correct size, measure from the window frame to the drywall edge, and then add a few extra inches to the length for an overhang. A common measurement for a window sill is about 4 inches, but this can vary depending on your preferences.
Once you have your measurements, cut a 1″ x 6″ piece of lumber to the desired length. If needed, use a table saw to rip the board to the correct width. Don’t worry if your cuts aren’t perfect, the gaps can be easily covered with wood filler or caulk.
Step 3: Install the Top Jamb
Image Credit: Gemini AI
Next, it’s time to install the top jamb, which runs across the top of the window. Use a level to ensure the jamb is perfectly horizontal. Just like the window sill, the edges of the top jamb should be flush with the face of the drywall. For a smooth finish, shim the jamb if necessary and nail it in place securely.
Step 4: Install the Side Jambs
The side jambs are vertical trim pieces installed on the sides of the window. Cut them to the same width as the top jamb for a clean, uniform look. Use a level to ensure they’re straight, and check that they’re plumb before nailing them into place.
It’s always a good idea to measure each side separately, as they may not be identical in length. This step ensures that the window trim is symmetrical and professional-looking.
Step 5: Install the Side Casings
The next step involves installing the side casings. These are the decorative pieces that frame the window. The side casings should be cut to match the length of the window sill to the top jamb. Again, remember to measure each side individually.
For a balanced look, leave a small reveal (about a 1/4-inch) between the casing and the side jamb. Use a level to double-check that the casings are aligned, then secure them with nails into both the jambs and the wall.
Step 6: Build and Attach the Decorative Header Casing
Image Credit: Gemini AI
The header casing is what really elevates the look of your window or door trim. It adds visual interest and brings everything together. To make the header, measure the width between the two side casings and cut a piece of 1″ x 6″ lumber to that length. Then, cut two smaller pieces of 1″ x 2″ lumber and attach them to either side of the larger piece to create the layered look.
Once assembled, the header should sit flush with the top of the side casings. Nail it in place, ensuring that the ends are aligned with the casings for a clean and cohesive look.
Step 7: Install the Apron
The apron is the final piece of trim and is placed just below the window sill. To ensure the apron is the right length, measure from the outside edges of the side casings across the bottom of the window. Cut a 1″ x 4″ piece of lumber to this length.
Using a level, make sure the apron is straight before nailing it in place. The ends of the apron should align perfectly with the edges of the side casings for a neat, finished appearance.
Step 8: Finishing Touches: Caulk, Filler, and Paint
Image Credit: Gemini AI
Once the trim pieces are securely in place, it’s time to finish the job. Use wood filler to cover any gaps or nail holes. Apply caulk to any small seams between the trim and the wall, and once it’s dry, sand everything smooth. A fresh coat of paint or stain will complete the look and give your window or door trim a polished, professional appearance.
Frequently Asked Questions
How do I choose the right trim for my windows?
When selecting trim for your windows, consider the overall style of your room and home. For a modern look, opt for clean lines with simple trim. For a more traditional feel, go for decorative moldings and layered trim. Always ensure that the trim you choose complements the rest of your home’s decor.
Can I install window trim without any experience?
Yes, you can! While installing window trim may seem intimidating, the process can be simplified by avoiding miter cuts. With basic tools and some patience, anyone can install window and door trim like a pro.
What tools do I need for this project?
For this DIY window and door trim project, you’ll need a utility knife, measuring tape, saw (miter or table), level, hammer, nails, wood filler, caulk, and a paintbrush. These are the essential tools to help you achieve a smooth, professional finish.
How long does it take to trim a window?
Trimming a window typically takes a few hours, depending on the complexity of the trim and your level of experience. With careful measurements and a clear plan, you can expect to finish the job in half a day.
Can I use this technique for doors?
Absolutely! This method for trimming windows can easily be applied to doors as well. The process remains the same, just adjust the measurements based on the door’s dimensions.
Conclusion
Updating your windows and doors with custom trim is a straightforward and rewarding DIY project. By skipping the miter cuts, you can achieve a high-end look without the stress and complexity of angled cuts. This easy-to-follow method allows you to create window and door casings that add character and style to any room in your home.
Whether you’re a beginner or a seasoned DIYer, these steps will guide you to a professional finish that elevates your home’s aesthetic. Plus, the satisfaction of completing the project yourself is immeasurable.