Easy DIY Subway Tile Kitchen Backsplash Ideas for Beginners
Subway tiles have long been a timeless choice for kitchen backsplashes, offering a combination of classic appeal and modern versatility.
Whether you’re renovating your kitchen or planning a new design, subway tiles can transform your space, adding a touch of elegance and sophistication.
This guide explores diverse subway tile backsplash ideas, design trends, installation tips, and how to choose the right materials for your kitchen.
Popular Subway Tile Patterns for Kitchen Backsplashes
The classic brick pattern may come to mind when thinking of subway tiles, but there are many other layout options to explore. Each pattern offers a different visual effect and works with a variety of design themes.
Classic Brick Pattern
The classic brick pattern is the most popular and traditional layout for subway tiles. This layout features tiles arranged in a staggered, rectangular grid, mimicking the look of bricks laid in a wall.
The brick pattern offers a timeless appeal and works well in kitchens with both vintage and contemporary themes.
Herringbone Pattern
For a more dynamic and sophisticated design, the herringbone pattern is a stylish option. This layout places the tiles at 45-degree angles to create a zig-zag effect.
It adds texture and movement to your backsplash, making it ideal for a modern or transitional kitchen.
Vertical Stacked Pattern
In contrast to the traditional horizontal brick pattern, a vertical stacked subway tile pattern places tiles in straight rows, creating a contemporary and clean look.
This pattern is especially useful in kitchens with a modern or minimalist design, as it emphasizes height and creates a sleek appearance.
Chevron Pattern
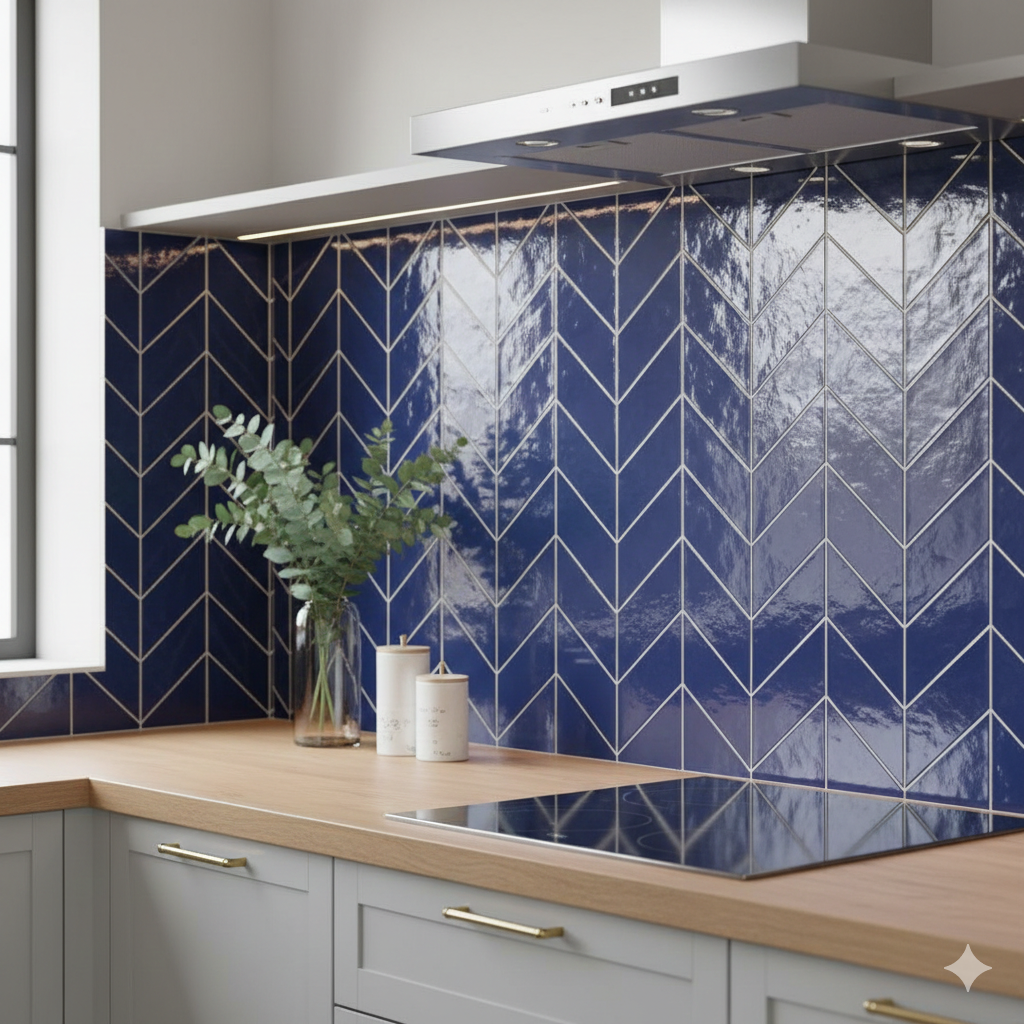
Similar to the herringbone pattern, the chevron layout uses angled tiles, but the ends of the tiles meet to form a continuous “V” shape.
This pattern adds depth and intrigue to your backsplash, creating a striking visual effect in any kitchen.
Diagonal Pattern
Placing subway tiles at a 45-degree angle to create a diamond shape is an excellent way to add interest to your backsplash. The diagonal pattern works well in kitchens with bold color schemes or eclectic designs, as it helps break up the uniformity of a traditional layout.
Choosing the Right Subway Tile Material for Your Kitchen Backsplash
Subway tiles come in various materials, each offering distinct advantages. The right material can elevate the look of your kitchen while enhancing functionality.
Ceramic Subway Tiles
Ceramic is one of the most popular materials for subway tiles due to its affordability, durability, and wide range of colors.
Ceramic subway tiles are resistant to moisture, making them perfect for use in a kitchen backsplash.
They are also relatively easy to install and maintain, making them an excellent option for DIY projects.
Porcelain Subway Tiles

Porcelain tiles are similar to ceramic tiles but are denser and less porous. They are highly durable and resistant to stains, scratches, and water damage. Porcelain subway tiles are ideal for high-traffic kitchens where durability is a top priority.
Glass Subway Tiles
Glass subway tiles offer a sleek and modern look, with the added benefit of reflecting light to brighten up your kitchen.
They are easy to clean and resistant to moisture, making them an excellent choice for kitchen backsplashes. However, glass tiles are more fragile than ceramic or porcelain, so they may require extra care during installation.
Marble Subway Tiles
For a luxurious and elegant look, marble subway tiles are a top choice. Marble adds natural veining patterns that create a sophisticated aesthetic.
However, marble requires more maintenance than ceramic or porcelain due to its porous nature. It is susceptible to staining, so regular sealing is essential.
Natural Stone Subway Tiles
Natural stone tiles, such as slate, travertine, and granite, offer a rugged and earthy feel to your kitchen backsplash. These materials are durable and unique, with each tile having distinct characteristics.
However, natural stone tiles are more expensive than ceramic or porcelain and require regular sealing to protect against stains and moisture.
Best Subway Tile Colors for Kitchen Backsplashes
While white subway tiles remain a classic choice, there is a vast array of colors and finishes available to help you create a custom look for your kitchen. Here are some of the best subway tile color options to consider:
Classic White Subway Tiles
White subway tiles are the epitome of timeless style. They are versatile and can be paired with virtually any color scheme or design style, from rustic to modern.
White tiles can make your kitchen appear brighter and more spacious, especially in smaller kitchens with limited natural light.
Gray Subway Tiles
For a more contemporary feel, gray subway tiles are a popular choice. Gray offers a neutral yet modern aesthetic that complements a variety of design elements. It works particularly well in industrial-style kitchens or those with muted color palettes.
Black Subway Tiles
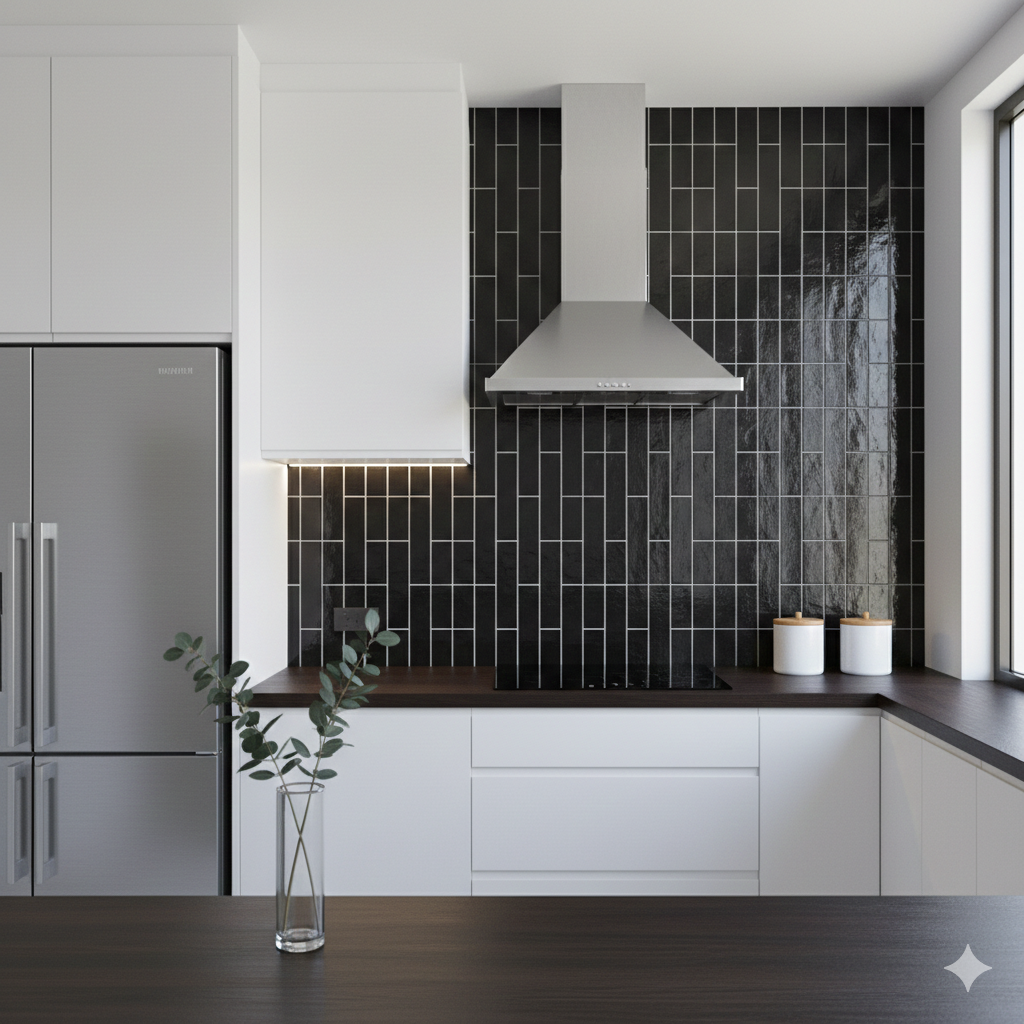
Black subway tiles can create a bold and sophisticated backsplash, especially when paired with contrasting elements like white cabinets or stainless steel appliances. Black tiles add drama and depth to your kitchen, making them perfect for a more contemporary or minimalist design.
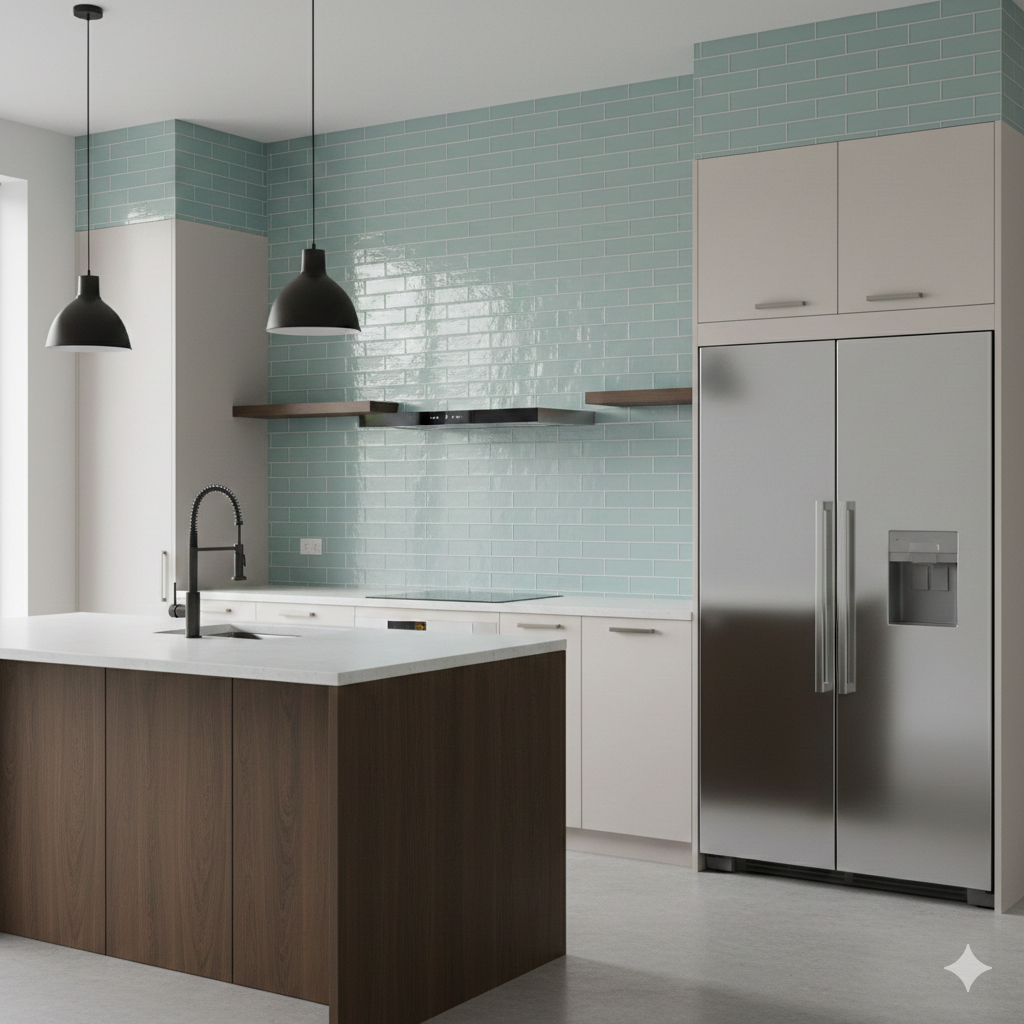
Pastel Subway Tiles
For a soft, retro vibe, pastel-colored subway tiles are an excellent option. Shades like light blue, mint green, and pale pink can add warmth and personality to your kitchen without overwhelming the space. Pastel tiles work well in coastal or vintage-inspired kitchens.
Bold and Vibrant Colors
For those who want to make a statement, bold and vibrant colors like emerald green, navy blue, or deep red can transform your kitchen into a showstopper. These colors work well in kitchens with a more eclectic or bohemian design, where the backsplash acts as the focal point.
Subway Tile Backsplash Design Ideas
Minimalist White Subway Tile Backsplash
For a clean and timeless look, a minimalist white subway tile backsplash is always a safe bet. Paired with light-colored cabinetry and sleek countertops, this design creates a fresh, open, and airy atmosphere. Accent the design with chrome or gold fixtures for a touch of elegance.
Bold Black Subway Tile Backsplash
If you’re aiming for a sleek, modern kitchen, consider a bold black subway tile backsplash. Pair it with light-colored cabinetry and stainless steel appliances for a striking contrast that adds drama without overwhelming the space.
This design works exceptionally well in minimalist kitchens or those with industrial elements.
Glass Subway Tiles for a Modern Twist
Glass subway tiles are perfect for a modern, high-end kitchen design. The reflective surface helps to bounce light around the room, creating a bright and spacious feel.
Combine glass tiles with neutral cabinetry and stainless steel or matte black fixtures for a contemporary, polished look.
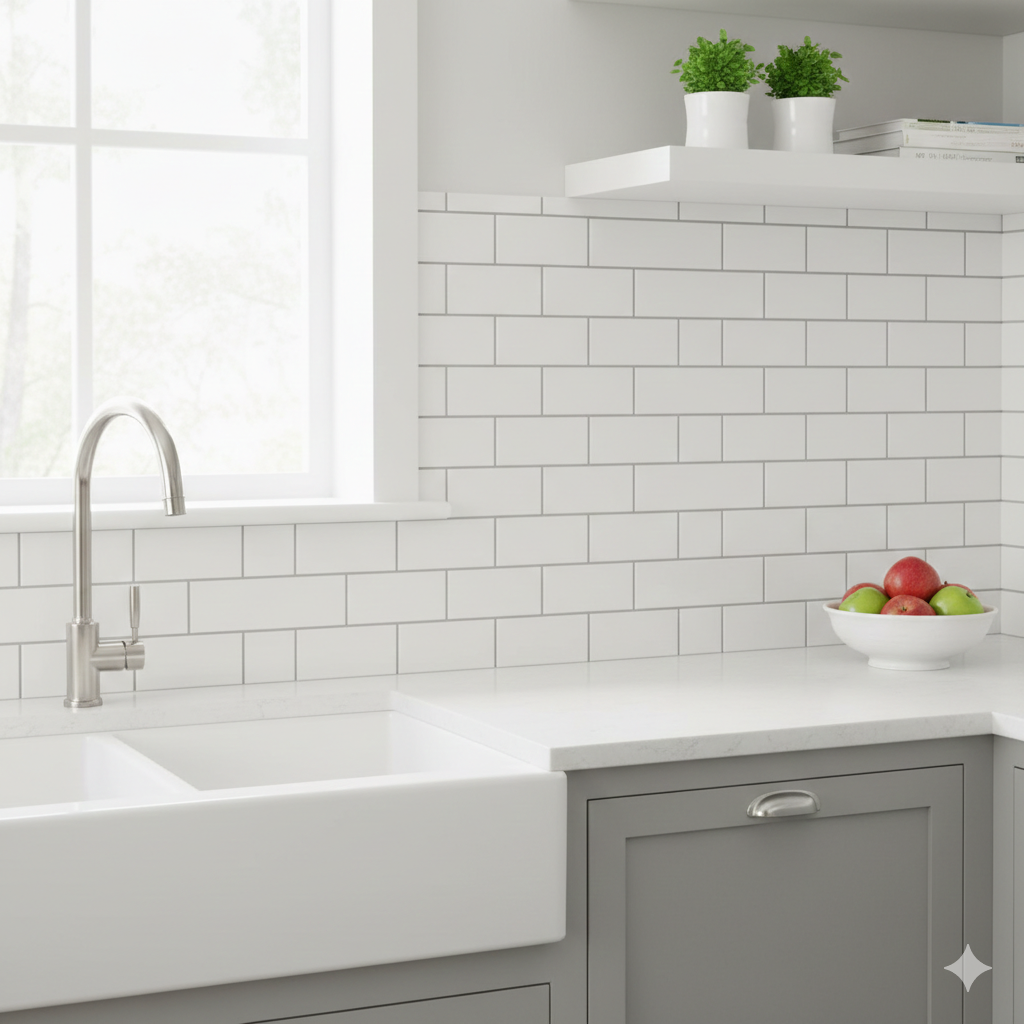
White Subway Tiles with Dark Grout
For a contemporary take on the classic subway tile backsplash, opt for white subway tiles paired with dark grout.
The contrast between the white tiles and dark grout adds visual interest, making the backsplash stand out as a feature of the kitchen. This combination works well in modern and industrial-style kitchens.
Colorful Subway Tile Backsplash
If you’re not afraid to be bold, consider a colorful subway tile backsplash to inject personality into your kitchen.
Opt for vibrant colors like deep blue or bright yellow to create a striking focal point. Pair these with neutral cabinetry to ensure the backsplash remains the star of the show.
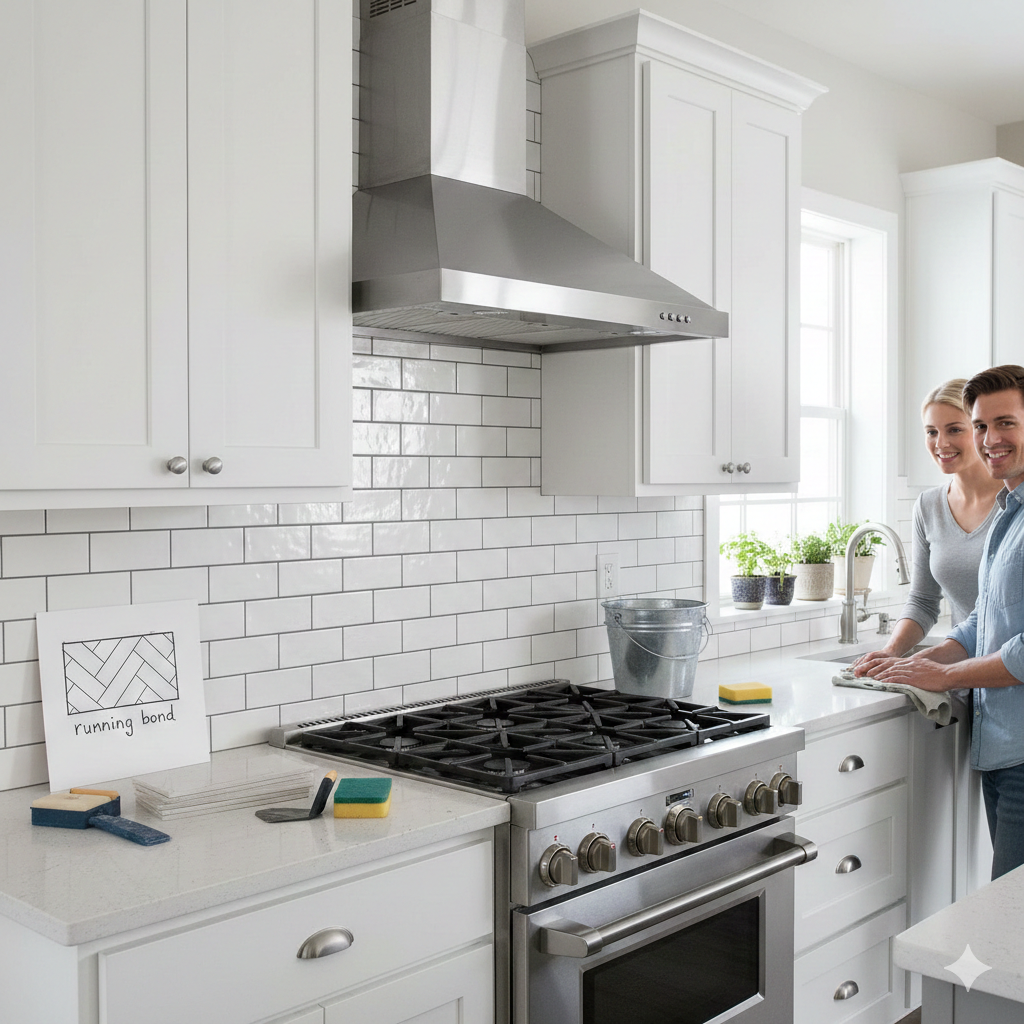
How to Install Subway Tile Backsplashes
Step-by-Step Guide to Installing Subway Tile Backsplashes
- Prepare the Surface: Clean and level the wall where the tiles will be installed. Remove any old backsplash or wall coverings.
- Measure and Mark: Use a level and pencil to mark horizontal and vertical guidelines on the wall to ensure your tiles are properly aligned.
- Apply Thinset Mortar: Spread a thin layer of thinset mortar on the wall using a notched trowel. Work in small sections to ensure the mortar remains wet while you apply the tiles.
- Place the Tiles: Press each subway tile firmly into the mortar, starting from the bottom and working upwards. Use tile spacers to ensure even gaps between tiles.
- Cut Tiles to Fit: Use a tile cutter or wet saw to trim tiles as needed around edges, outlets, and corners.
- Grouting: Once the tiles are set, allow the mortar to dry before applying grout. Spread grout over the tiles, filling in the gaps and smoothing the surface with a rubber float.
- Clean Excess Grout: Wipe away excess grout with a damp sponge. Once the grout has dried, polish the tiles with a clean, dry cloth.
Maintenance Tips for Subway Tile Backsplashes
- Regular Cleaning: Wipe down the backsplash regularly to prevent grease, stains, and food buildup. For ceramic or porcelain tiles, use a mild dish soap solution and a soft cloth. For natural stone tiles, avoid acidic cleaners.
- Seal Natural Stone Tiles: If you opt for marble, granite, or another natural stone, be sure to seal the tiles regularly to protect them from moisture and stains.
- Grout Sealing: To prevent grout from absorbing stains and dirt, seal it every six months.
Conclusion
Subway tiles are a classic choice for kitchen backsplashes, offering a wide range of design possibilities to suit any style.
From timeless white subway tiles to bold black or vibrant colored options, there is a subway tile pattern and color for every kitchen.
By choosing the right material, pattern, and installation method, you can create a stunning, durable, and functional backsplash that will enhance the look of your kitchen for years to come.
Read the original article in Crafting Your Home.