7 Safe and Humane DIY Mouse Trap Ideas You Can Make at Home
Humane DIY Mouse Trap Basics That Actually Work
Along walls, behind appliances, under sinks (dry corners), beside pantry shelves, and near droppings or gnaw marks.
Mice prefer edges and hidden “runways.” Placing a DIY mouse trap in open floor space often wastes time because mice avoid exposed areas. The most productive spots are where the mouse already feels secure: behind the fridge, along baseboards, near the stove, and at entry points like garage doors or pipe openings.
A pea-sized dab of peanut butter.
Bucket-and-Roller DIY Mouse Trap for Multiple Mice
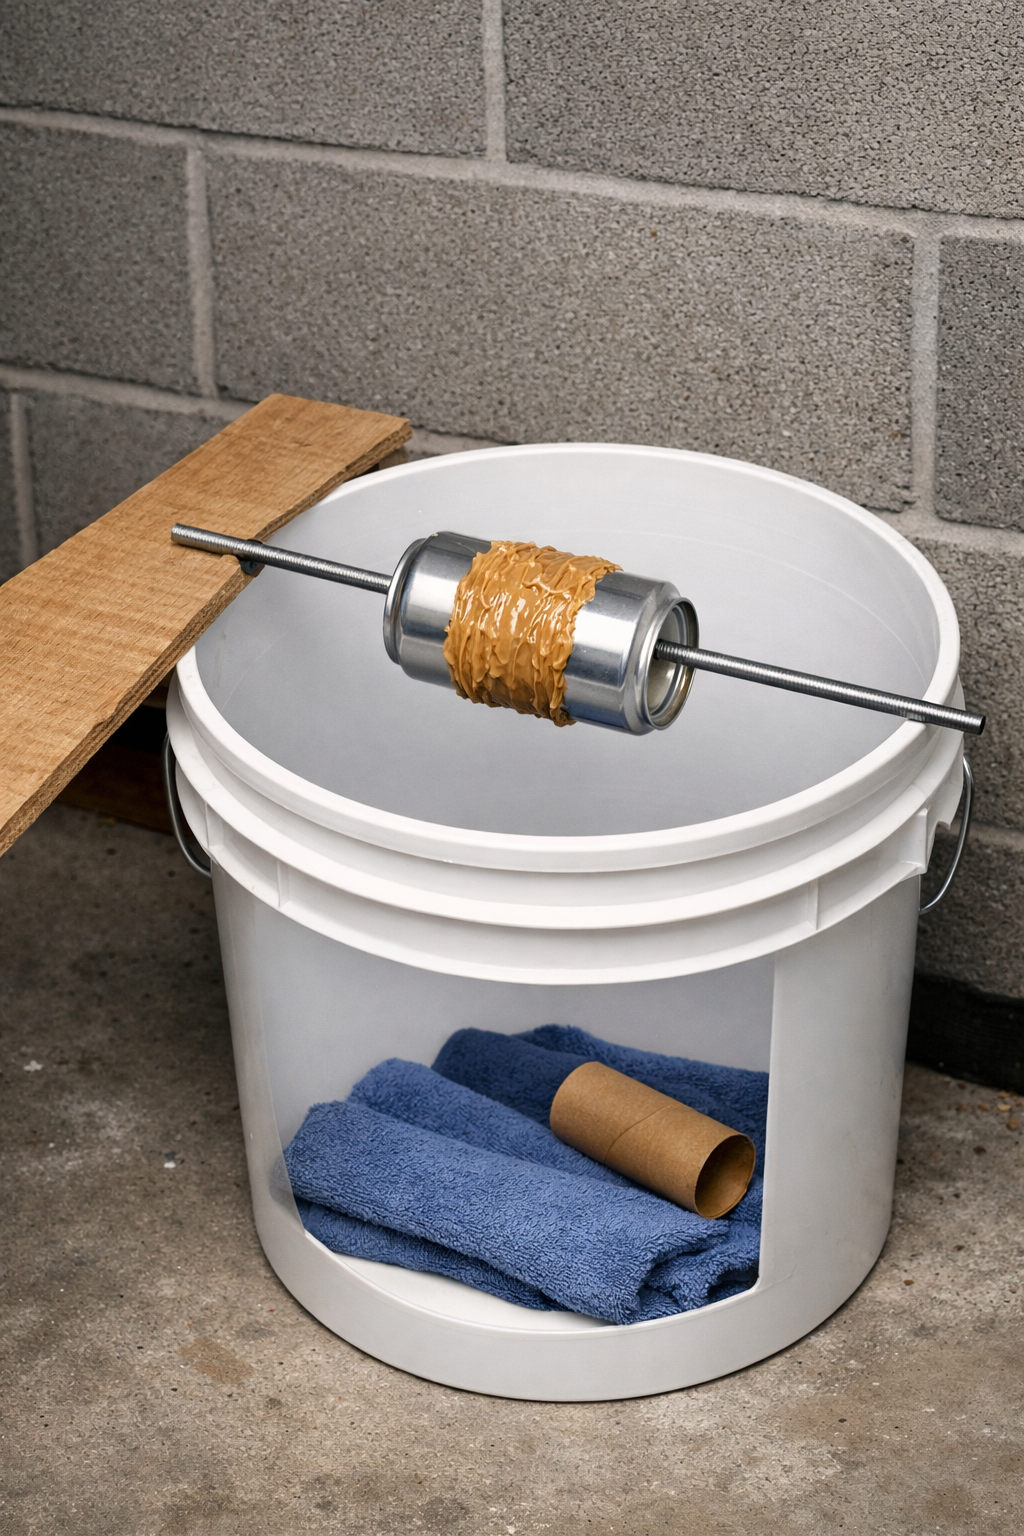
Why it works: one setup can catch multiple mice without constant resetting
- Deep bucket (smooth interior helps prevent escape)
- Empty soda can
- Metal rod/skewer/straightened coat hanger
- String or wire (if needed to stabilize)
- Cardboard or wood ramp
- Peanut butter
- Thread the rod through the can.
- Rest the rod across the bucket rim so the can hangs centered and spins freely.
- Smear a thin band of peanut butter around the can’s middle.
- Create a ramp up to the rim (gentle angle, stable footing).
- Place the bucket along a wall where signs of activity appear.
Tube-and-Drop DIY Mouse Trap for Tight Spaces
Why it works: mice love tunnels; the “safe tunnel” becomes a controlled drop
- Paper towel tube (or toilet paper tube)
- Coins + tape (as a stabilizing weight)
- Deep bin/bucket with smooth sides
- Peanut butter
- Place the tube near the edge of a counter/shelf so one end overhangs above the bin.
- Tape coins on top of the tube so it stays steady until weight shifts forward.
- Put a small dab of bait at the inner lip of the overhanging end.
- Position the bin directly underneath.
Shoebox Drop Trap DIY Mouse Trap
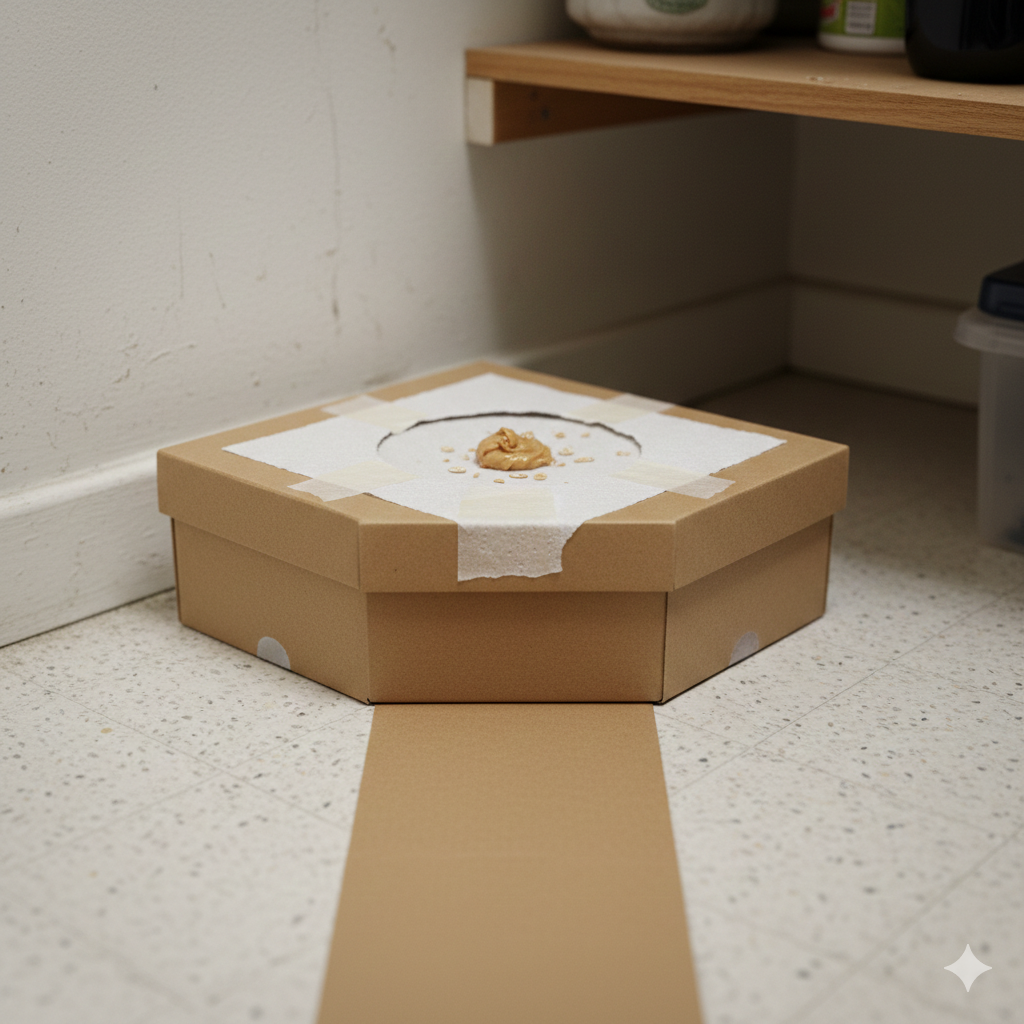
Why it works: a “weak platform” collapses under weight and drops the mouse into a closed container
- Shoebox with lid
- Paper towel sheet
- Tape
- Scissors
- Bait
- Cut a hole in the lid (large enough for a mouse to fall through).
- Tape a single layer of paper towel over the hole, taut but not reinforced.
- Place bait in the center of the paper towel.
- Set the box along a wall, with the approach path clear.
Jar-and-Coin DIY Mouse Trap for Clean Indoor Capture
Why it works: minimal mess and quick release
- Large glass jar or sturdy plastic container
- Coin
- Peanut butter
- Smear bait inside near the back.
- Prop one side of the jar up with a coin so the opening is slightly raised.
- Place the jar along a wall.
PVC Pipe DIY Mouse Trap for Hidden Placement
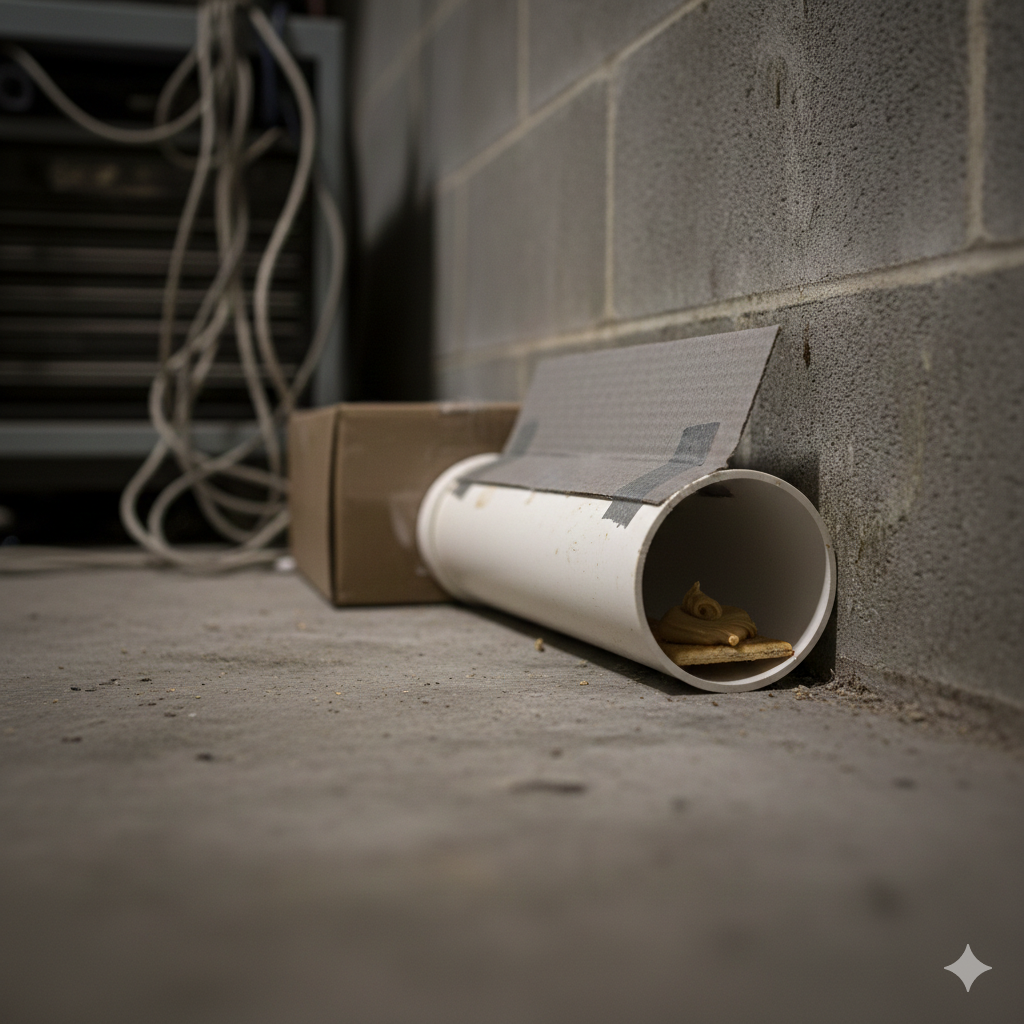
Why it works: looks unobtrusive and feels like a natural tunnel to mice
- Short PVC pipe section (wide enough for a mouse)
- End cap or improvised flap-style closure
- Bait
- Place bait deep inside the pipe.
- Use a simple one-way flap (flexible plastic or cardboard) at the exit end so entry is easy but exit is harder.
- Position it along a wall near activity.
After a DIY Mouse Trap Works
Away from the home, near ground cover, not near busy roads.
- Wear gloves.
- For jar/box traps, slide cardboard under the opening before carrying outdoors.
- Open gently and step back.
- Store food in sealed containers.
- Remove crumbs and grease films (especially around stove and pantry).
- Seal gaps around pipes and under doors with durable materials.
- Reduce clutter along walls where mice hide and travel.
Conclusion
A humane DIY mouse trap is most effective when it’s simple, well-placed, and part of a larger plan. Gravity-based traps, like the bucket-and-roller, tube-and-drop, and shoebox drop, turn a mouse’s natural instincts into predictable outcomes without injury. Clean container-style options like the jar-and-coin trap add discretion, especially in kitchens and indoor areas where mess is a deal-breaker.
Results improve dramatically when the trap matches the setting. Multi-catch bucket designs excel in basements, garages, and pantry-adjacent zones where activity is repeated and runway paths are obvious. Tight-space traps work best where mice travel ledges and edges, countertops, shelf lines, and cabinet borders. The key isn’t complexity; it’s consistency: place traps along walls, use a small but sticky bait, keep approach paths clear, and check regularly.
Finally, the fastest way to end the problem is to make the home less inviting after the first catch. Food storage, quick sanitation, and sealing entry points reduce the chance of new mice replacing the old. When trapping and prevention work together, the situation shifts from stressful to manageable, often within days.
Read the original article on Crafting Your Home