How to Create a Stunning DIY Flower Chandelier
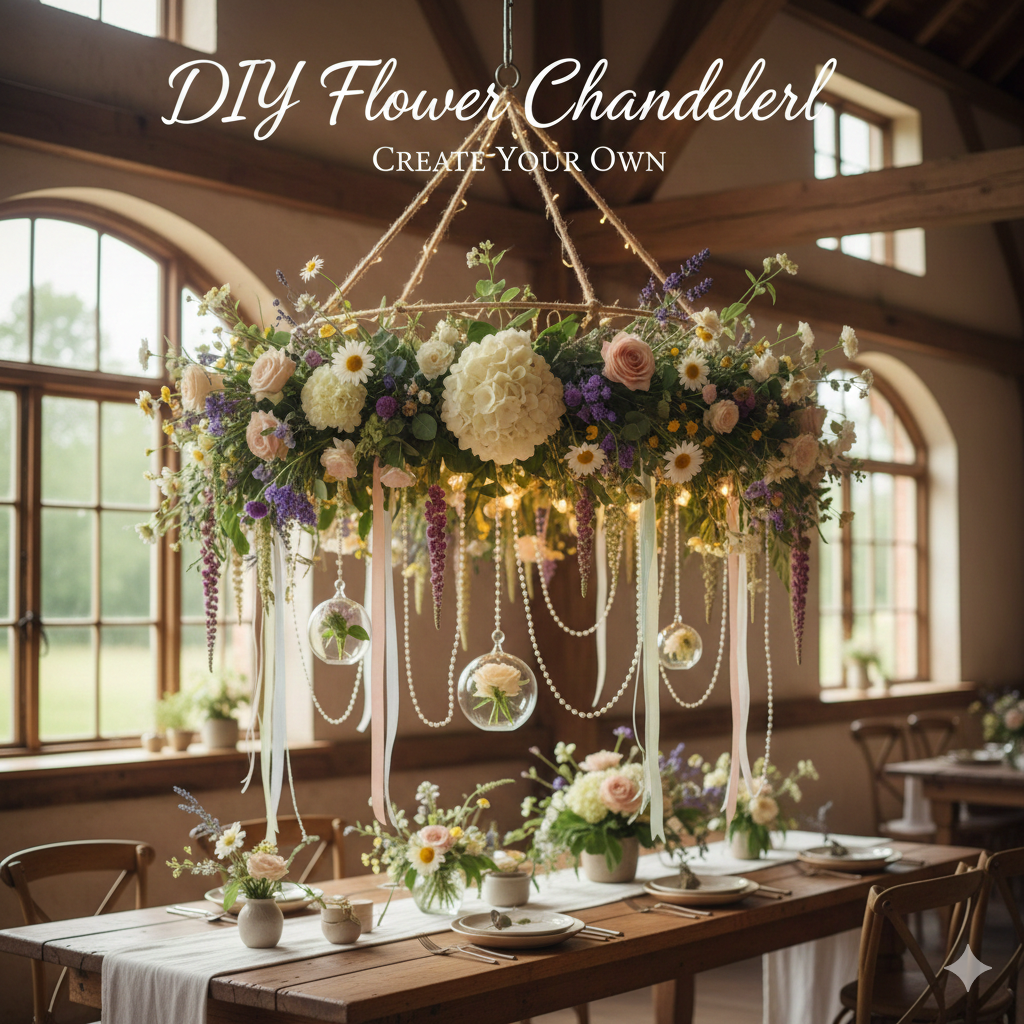
If you’re looking to elevate your home decor and infuse a touch of elegance and creativity, there’s nothing quite like crafting your own DIY flower chandelier. A floral chandelier not only adds a dramatic flair to any room but also reflects your personal style.
In this comprehensive guide, I’ll walk you through how to make a breathtaking flower chandelier that will impress your guests and enhance your living space, all while saving you money compared to store-bought options.
What is a DIY Flower Chandelier?
A flower chandelier is a statement piece often used in home interiors, especially in spaces like dining rooms, living rooms, and bedrooms. It combines the functionality of a traditional chandelier with the beauty of natural or artificial flowers.
You can choose flowers that match your existing decor, whether you prefer vibrant colors or soft pastel hues. The results? A chic, sophisticated, and somewhat whimsical light fixture that not only illuminates the room but also serves as a conversation starter.
Why Should You Make a DIY Flower Chandelier?
- Cost-Effective: The price of a high-quality floral chandelier can be steep. By making your own, you save a substantial amount.
- Customization: You get to pick the flowers, colors, and design that perfectly match your space and personal taste.
- Creative Outlet: Crafting something with your hands can be incredibly rewarding, and you’ll have a one-of-a-kind piece to showcase.
Materials You’ll Need for Your DIY Flower Chandelier
Basic Materials:
- Chandelier Frame: Start with a basic chandelier frame. You can either repurpose an old chandelier or buy a basic frame from a craft store or online.
- Artificial Flowers: While you can use real flowers, artificial ones offer longevity and reduced maintenance. Choose flowers that match your color scheme and style.
- Hot Glue Gun and Glue Sticks: The hot glue gun is ideal for attaching flowers to the chandelier base, providing a strong and durable bond.
- Floral Wire: Floral wire is flexible and will help secure flowers in place. It’s particularly useful for keeping flowers in their desired position.
- Spray Paint (Optional): If you’re working with an old chandelier, spray paint can help refresh and add a touch of elegance to the frame.
- LED Bulbs: Choose energy-efficient bulbs that complement your desired lighting effect. I recommend frosted bulbs for a softer, diffused light.
Optional Decorative Materials:
- Ribbons or Beads: To add extra flair, consider hanging ribbons or beads from the chandelier.
- Fake Leaves or Vines: These can complement the flowers and give your chandelier a more organic, natural feel.
Step-by-Step Instructions to Build Your DIY Flower Chandelier
Step 1: Prep Your Chandelier Frame
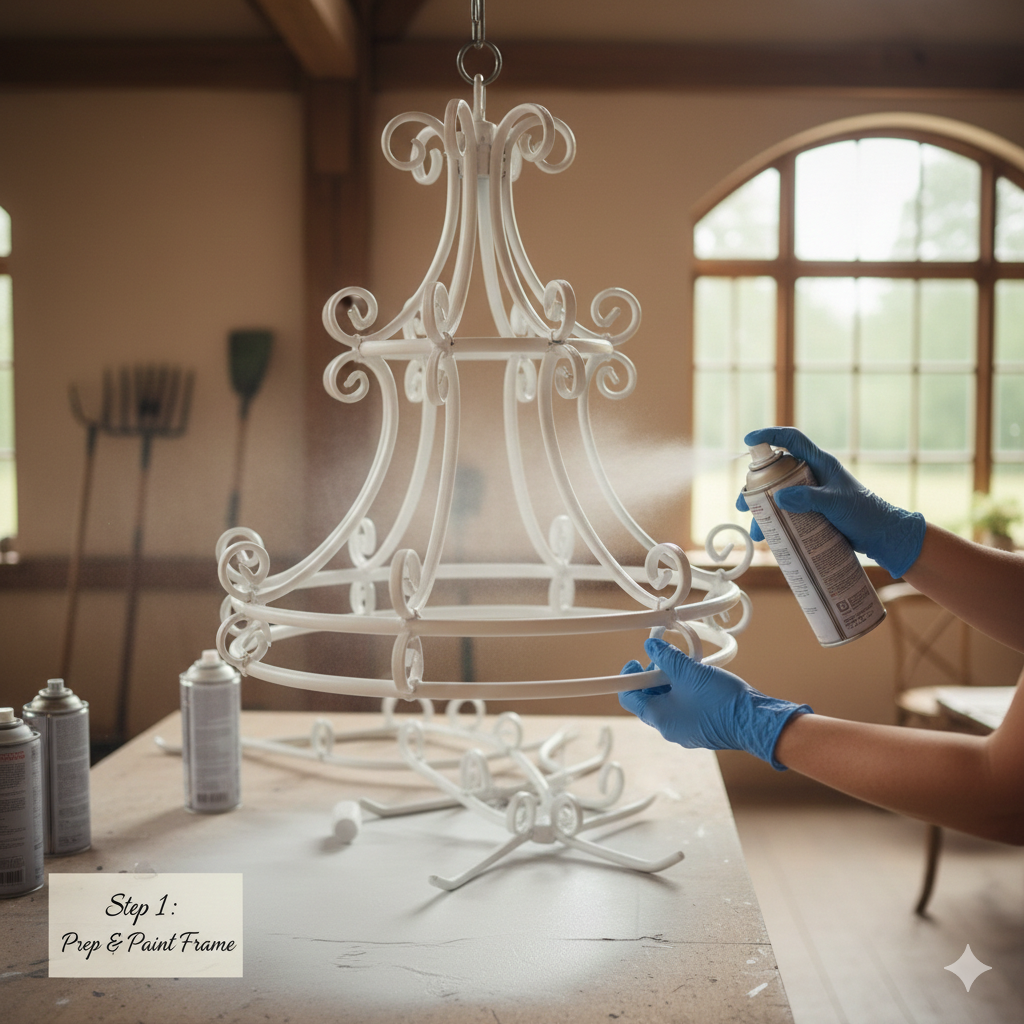
- Disassemble: If your chandelier has any existing attachments, take them off to start fresh.
- Paint the Frame: Use your preferred spray paint and cover the frame evenly. Allow the paint to dry completely before proceeding.
Step 2: Prepare Your Flowers
- Cut the Stems: Trim the stems of your flowers to the appropriate length, leaving a little excess to attach to the chandelier frame.
- Shape the Flowers: If necessary, arrange them to achieve the desired shape. You can bend the petals slightly or remove unwanted leaves to suit your vision.
Step 3: Attaching the Flowers to the Frame
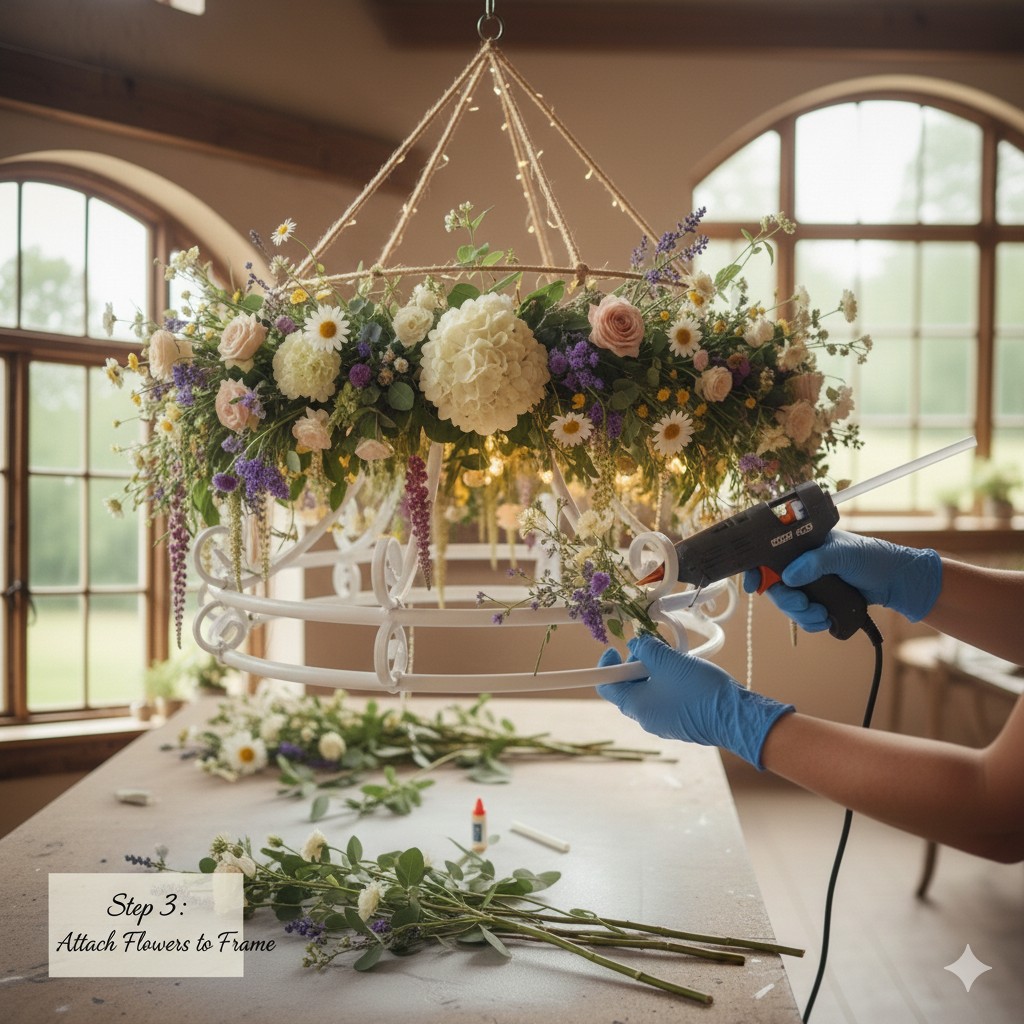
- Positioning: Determine where each flower will go. You can create clusters or a more uniform pattern. For a more organic look, let the flowers hang loosely or even vary their positioning.
- Glue: Using a hot glue gun, apply glue to the base of each flower stem and attach it to the frame. Press the flower gently into place for a few seconds to ensure a strong bond. Continue adding flowers until the entire frame is covered.
Step 4: Add Additional Decorations
- Ribbon: Tie ribbons around the flower stems or hang them from the chandelier frame for added texture.
- Beads and Lights: For a glamorous touch, you can string beads around the flowers or add strands of fairy lights between them to create a magical glow.
Step 5: Install the Bulbs
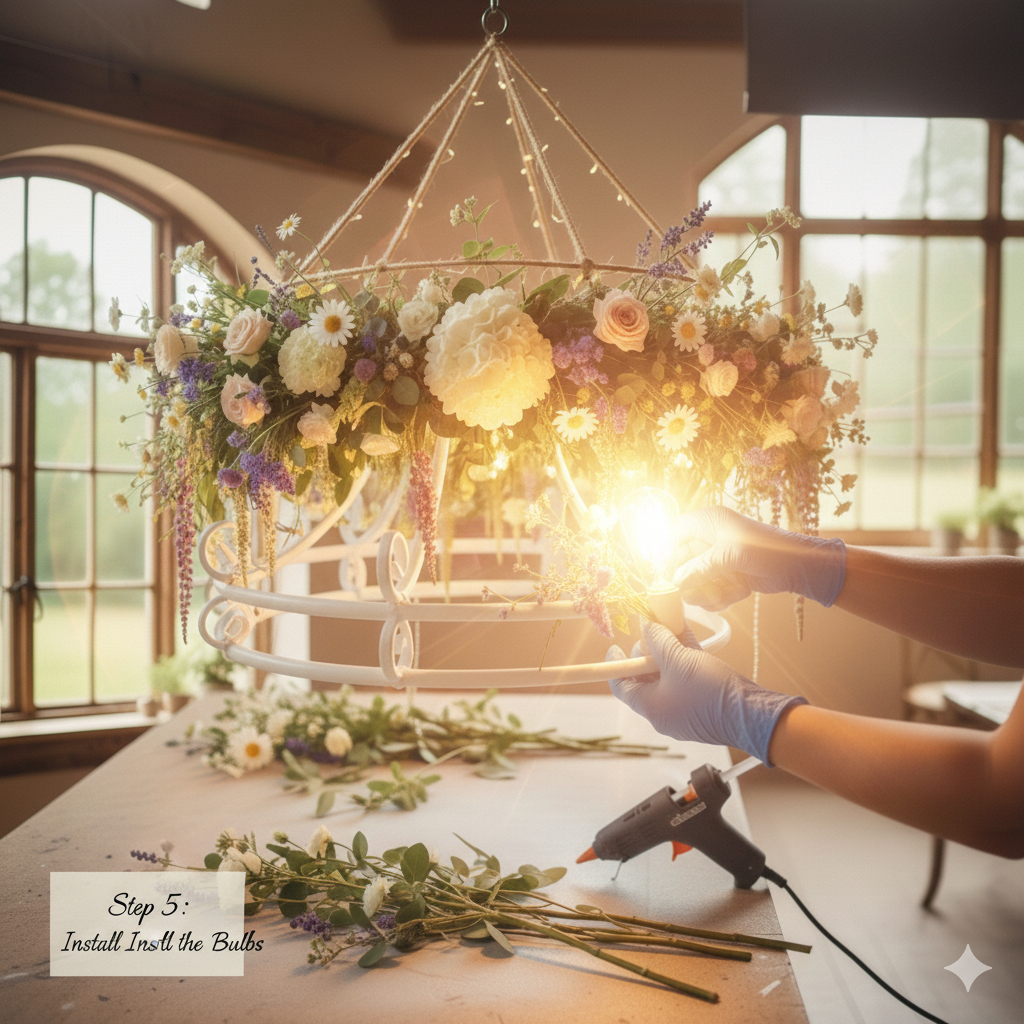
- Install Bulbs: Place the bulbs into the chandelier sockets. Ensure the bulbs are not too bright so the focus remains on the flowers.
- Test the Lights: Before finalizing the installation, plug in the chandelier to ensure that everything works and the lighting effect is as desired.
Step 6: Hang the Chandelier
- Mounting: Depending on your chandelier’s weight, you may need to use a secure mounting system.
- Positioning: Hang the chandelier at the appropriate height. Keep in mind that it should be low enough to show off the flowers but not so low that it gets in the way.
Tips for Maintaining Your DIY Flower Chandelier
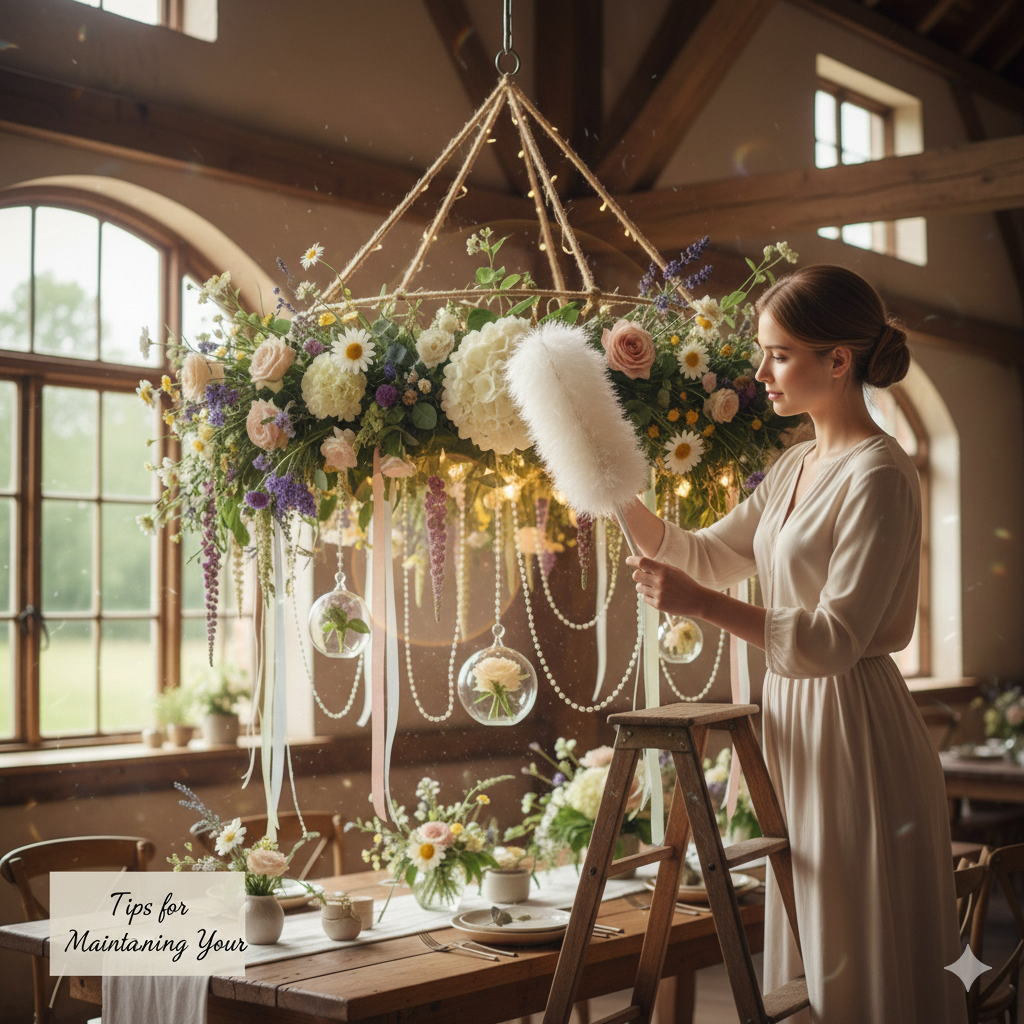
Maintaining your DIY flower chandelier is relatively easy, especially if you’ve used artificial flowers. Here are some maintenance tips to keep your chandelier looking fabulous for years to come:
- Dust Regularly: Since flowers can attract dust, it’s important to clean your chandelier every few weeks. A gentle dusting or a feather duster should suffice.
- Check the Lights: Occasionally check the bulbs to ensure they’re working and not too hot, as this could damage the flowers.
- Avoid Direct Sunlight: If you’re using artificial flowers, keep the chandelier away from direct sunlight, as prolonged exposure can cause the colors to fade.
The History and Significance of Flower Chandeliers
Architectural Influence
Conclusion
In conclusion, creating a DIY flower chandelier is an incredibly rewarding project that will bring beauty and charm to any room. With careful planning, creativity, and attention to detail, you can craft a one-of-a-kind light fixture that reflects your style and enhances your living space. Whether you’re tackling this project as a beginner or an expert DIYer, the process is fun, fulfilling, and ultimately creates a show-stopping piece.
Read the Original Article on Crafting Your Home