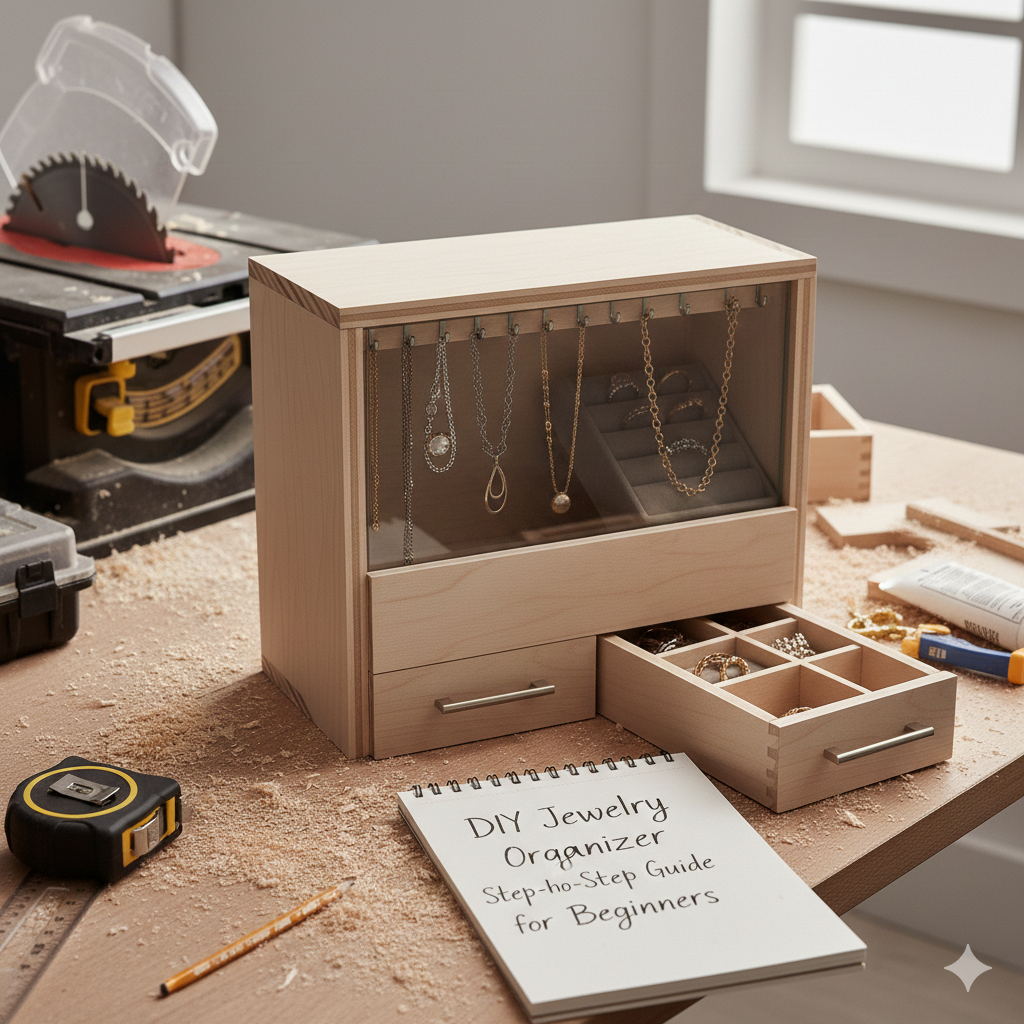
DIY Jewelry Organizer Step-by-Step Guide for Beginners
Jewelry is a cherished possession for many, and storing it properly is just as important as the pieces themselves. Whether you have a collection of statement necklaces, delicate earrings, or your everyday bracelets, organizing them in a way that’s both functional and beautiful is essential.
A DIY jewelry organizer can be a fantastic addition to your home, offering personalized style and efficient storage. If you’re looking to create the perfect space for your jewelry, here’s everything you need to know.
Why Build a DIY Jewelry Organizer?
The Benefits of a Custom Jewelry Organizer
Step-by-Step Guide to Building Your Own Jewelry Organizer
Plan Your Design
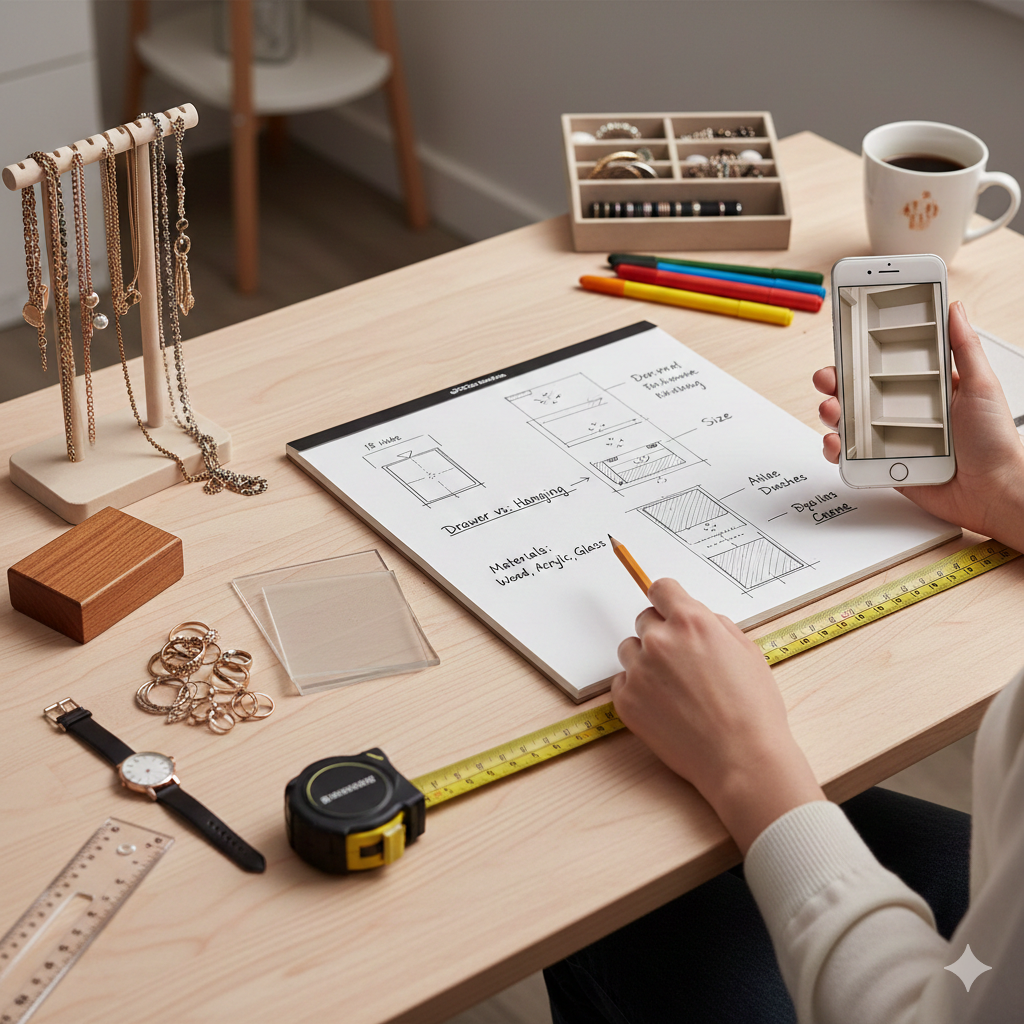
The first step in creating your DIY jewelry organizer is to plan out the design. Think about the type of jewelry you own and how you want to organize it. Do you need separate compartments for each type of jewelry, or would a general drawer with dividers suffice? Consider these points:
- Drawer vs. Hanging: Do you prefer a drawer with dividers, or would you prefer a hanging organizer with hooks for necklaces and rings?
- Materials: What materials do you want to use? Wood, glass, or acrylic are all popular choices.
- Size: Measure the space where you plan to place your jewelry organizer to ensure your design fits perfectly.
Gather Your Materials
Once you’ve decided on a design, it’s time to gather your materials. For a simple jewelry drawer, you’ll need the following:
- Wood for the frame and dividers (choose a durable wood like plywood or MDF)
- Glass for the top if you want a sleek, modern look
- Screws, nails, and wood glue
- Paint or stain for finishing
- Drawer slides or rails
- Felt or velvet lining (optional for added protection)
Construct the Frame
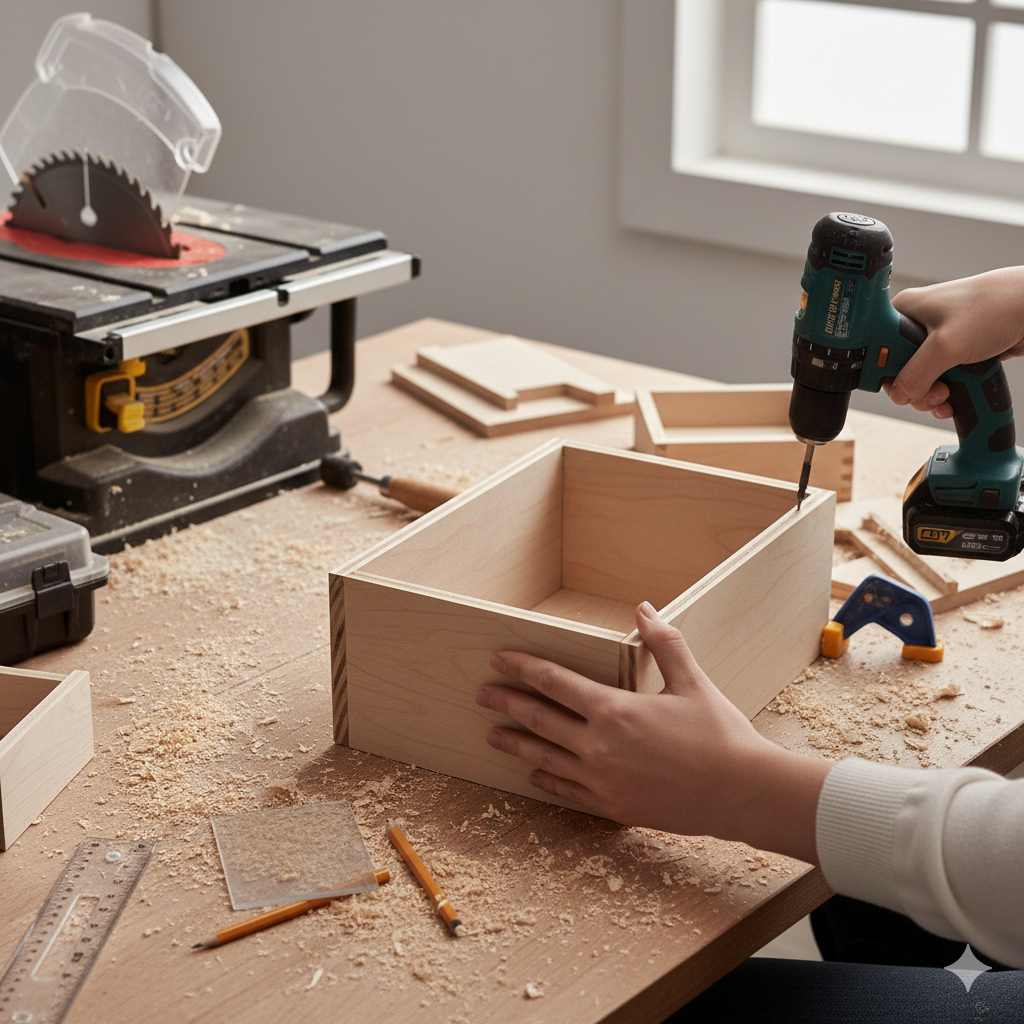
Now, it’s time to build the frame of your jewelry organizer. The size of the frame will depend on the space where you plan to place it and the size of your jewelry collection. For a basic drawer frame, cut the wood to the required dimensions. Using a power saw or a table saw, cut the wood to size, ensuring you have clean, even edges.
- Tip: If you’re using a glass top, measure the space for the glass, leaving a small gap around the edges for a perfect fit. The frame should be sturdy, so be sure to secure the joints with wood glue and screws.
Create Compartments
Once the frame is ready, it’s time to create compartments for your jewelry. For smaller items like rings and earrings, you can use small dividers, either made of wood or acrylic, to create separate sections. For larger items like necklaces or bracelets, you may prefer open spaces with adjustable dividers.
Install the Glass Top (Optional)
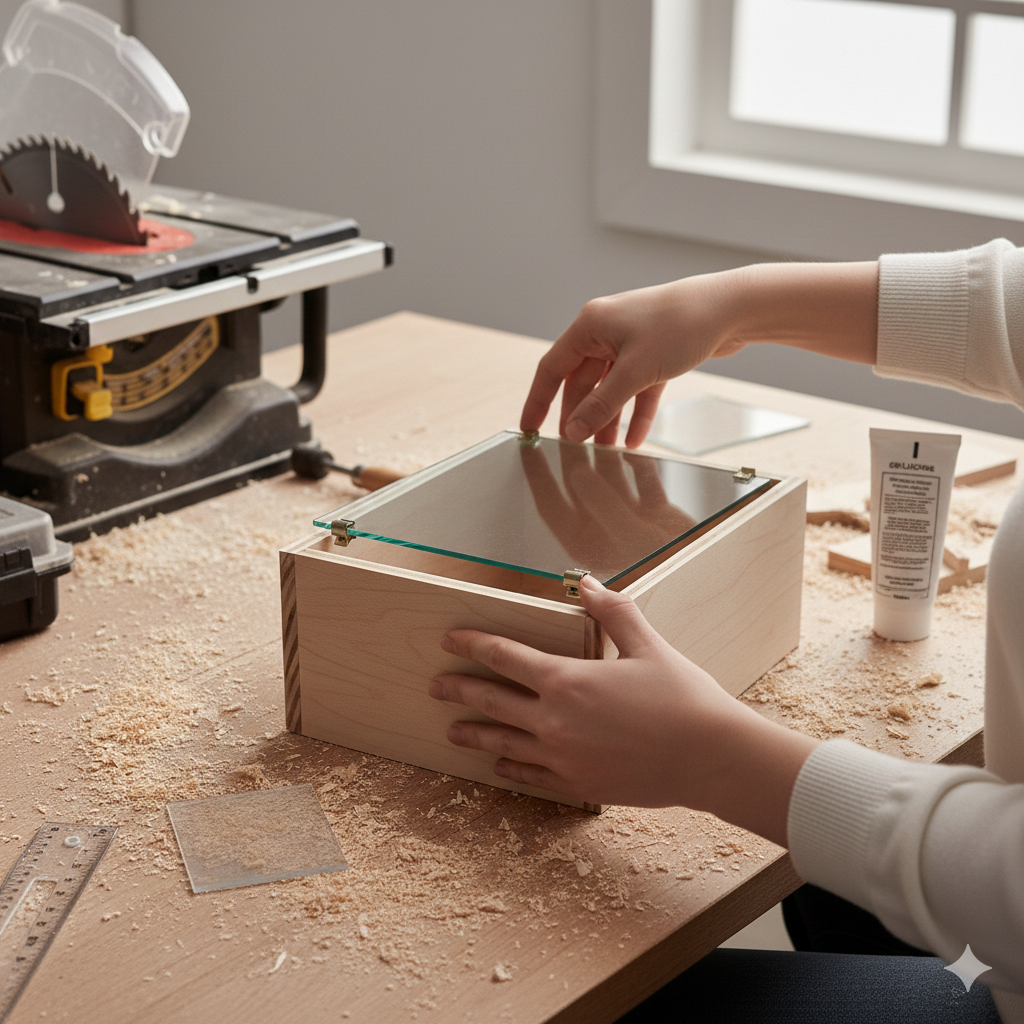
If you’ve chosen to add a glass top to your jewelry organizer, now is the time to install it. Measure the frame opening carefully and order a piece of glass cut to size. Once the glass is ready, simply place it on top of the frame and secure it using small glass clips or silicone adhesive.
Paint or Stain the Frame
To give your jewelry organizer a polished look, you’ll want to paint or stain the frame. Choose a color that complements your existing decor, or go for a bold, contrasting hue to make the organizer stand out.
Add Lining to the Drawers (Optional)
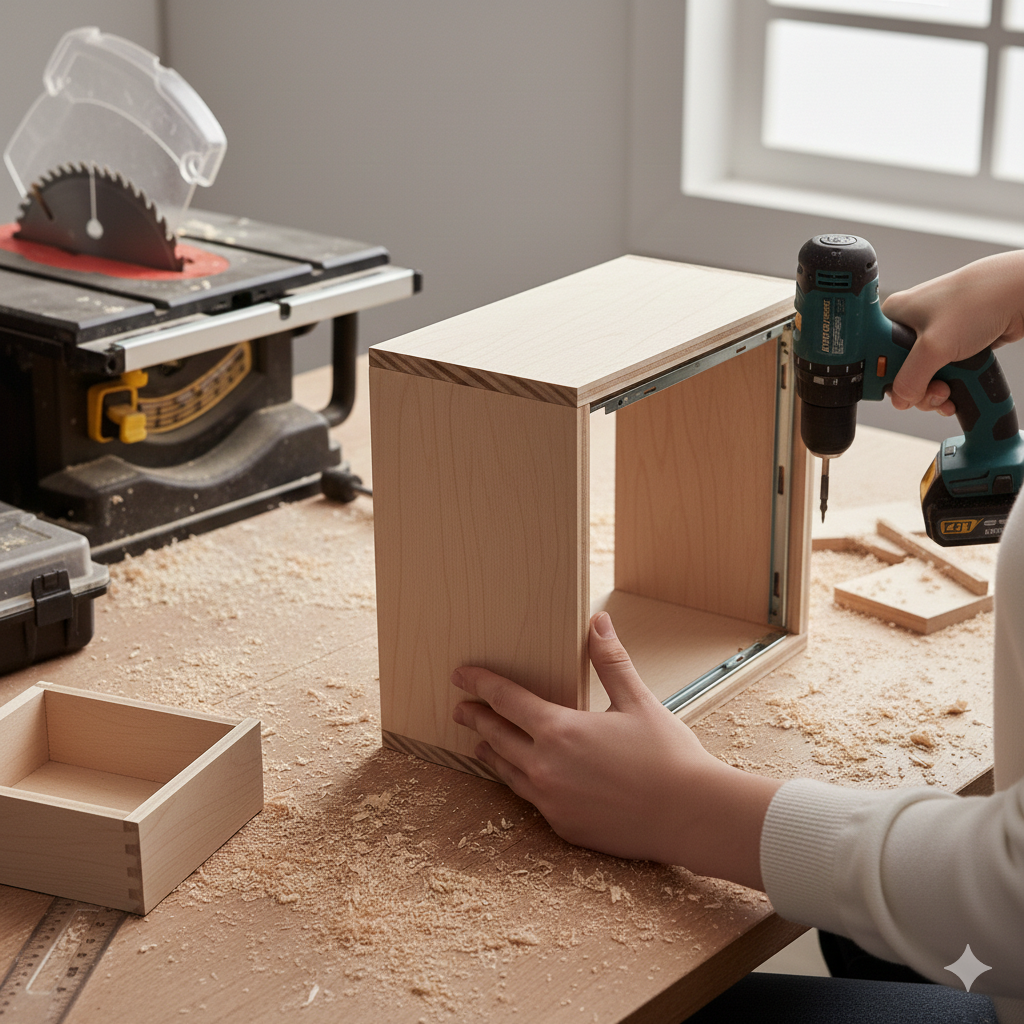
Install Drawer Slides
Final Touches
FAQs About DIY Jewelry Organizers
How Do I Organize Jewelry in a Drawer?
Can I Use Acrylic for My Jewelry Organizer?
What Type of Wood Should I Use for a Jewelry Organizer?
How Do I Prevent Jewelry from Tangling in My Organizer?
How Do I Clean My DIY Jewelry Organizer?
Conclusion
Building your own DIY jewelry organizer is an incredibly rewarding project. Not only do you end up with a highly functional piece, but you also get the satisfaction of creating something that reflects your personal style. With a bit of time and effort, you can design a custom jewelry organizer that fits your collection perfectly and enhances your home decor.
Whether you opt for a minimalist drawer with a glass top or a more decorative display, the key to a great jewelry organizer is personalization. Take the time to plan your design, select quality materials, and add those finishing touches to ensure that your jewelry is always stored in style.
A well-organized jewelry collection is not just about aesthetics, it’s about making sure your precious pieces are protected and easy to access. And with this guide, you’ll have the knowledge and tools you need to create the jewelry storage solution of your dreams.
Read the Original Article on Crafting Your Home